Monday, March 19, 2018

INSTANT JALEBI RECIPE WITHOUT YEAST - CRISPY CRUNCHY JUICY JALEBI

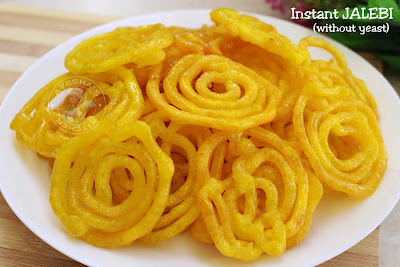
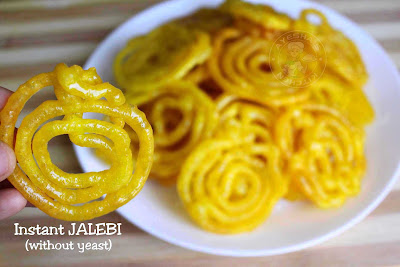
INSTANT JALEBI WITHOUT YEAST 

Jalebi is a very popular Indian sweet and it makes  special occasions more delectable. This festive dessert is loved by both kids and adults equally because of its taste and texture. You can make jalebis in different ways. Some recipe needs a day for fermentation while some recipe calls for yeast or eno salt. Fermentation makes the batter slightly sour. Here am sharing the recipe for Instant jalebi without  yeast. For the sour taste, i added curd. So it is very easy to whip up this dessert.. I took only 15 minutes to make this crispy juicy piping hot jalebis. I truely enjoyed making this melt in mouth Indian sweet at home. 

jalebi recipe indian sweets perfect recipe tasty crispy juicy jalebi popular sweets festive laddu jilebi instant jalebi

jalebi recipe indian sweets perfect recipe tasty crispy juicy jalebi popular sweets festive laddu jilebi instant jalebi

jalebi recipe indian sweets perfect recipe tasty crispy juicy jalebi popular sweets festive laddu jilebi instant jalebi


INGREDIENTS (1 cup = 250 ml)

All purpose flour / maida - 1 cup 
Cornflour  - 3 tsp
Baking powder - 1 tsp
Less sour curd/ yoghurt - quarter a cup
Yellow food color  - quarter tsp
Water -   half a cup + 3 tbsp
Oil  - for deep frying
Ghee - 1 tsp, optional

SUGAR SYRUP

Sugar   - 2 cups
Water  - 1.5 cups
Lemon juice - 1 tsp
Crushed cardamom - 2 nos


PREPARATION

Here is the video showing how to make Instant jalebi at home easily. 


  • In a mixing bowl, Sieve together All purpose flour, cornflour and baking powder. Mix well.
  • Combine curd and food color in another bowl. Add this curd mixture to the flour mixture and mix . 
  • Then add water little by little and make a smooth batter without any lumps. Do not pour the whole water at a time.
  • The jalebi batter must not be too thick nor too thin. So add water accordingly.
  • Pour the prepared jalebi batter into a squeeze bottle. You can also pipe the jalebis using a piping bag. Here i used a sauce bottle or squeeze bottle for making jalebi. Set aside.
  • Now prepare the sugar syrup. For that, heat sugar and water in a pan and stir so that sugar dissolves. Once the syrup starts to boil, simmer it for 5 minutes. For jalebi, we need half string consistency. That means, the consistency of sugar syrup in between sticky and one string.  So switch off the flame before one string consistency. Set aside and then add lemon juice and crushed cardamom to it. Mix well. 
  • Heat a pan with oil for deep frying over a medium low flame. Once hot, add a teaspoon of ghee (this is optional only). You can squeeze a drop of this batter to the hot oil to check the right temperature. 
  • Now start making swirls using squeeze bottle. You can check my detailed VIDEO given above for more details. 
  • Fry the jalebis over medium flame. Flip the jalebi when one side is done. Do not over fry.
  • When done, transfer the jalebis to a slotted spatula for draining the excess oil and immediately dip the hot jalebis  in sugar syrup for just 30 seconds. Transfer it to a plate. 
  • Repeat the same with remaining batter. 
  • So the piping hot crispy juicy jalebis are ready to serve. 
  • You can serve this warm or chilled. You can also keep the leftover jalebis for later use  in refrigerator. 
  • Do not forget to watch the video showing how to make instant jalebi. And please SUBSCRIBE to my channel too my dear friends.


Friday, March 9, 2018

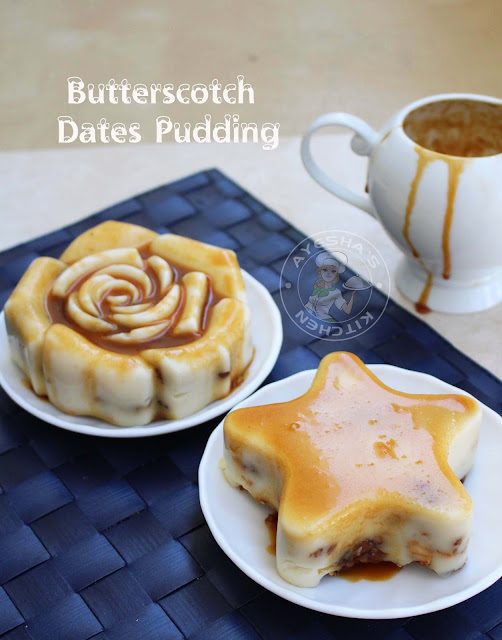
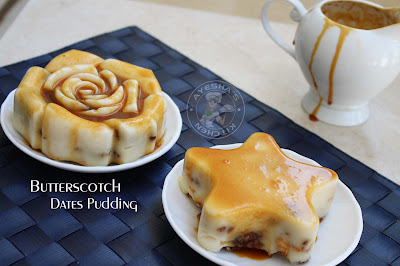
EASY BUTTERSCOTCH DATES PUDDING - YUMMY PARTY PUDDING

Yummy pudding recipes

So again am back with a yummy treat. A wonderful pudding recipe with a smooth creamy texture. The dates and nuts crumble give this pudding some crunchiness. Like so is a must try dessert recipe or pudding recipe for all those sweet lovers. I am really obsessed with dessert recipes. To be honest, with pudding recipes. This butterscotch dates pudding is a sweet combination of sweet, creamy and nutty flavor. And moreover, this is a party pudding too. A very simple and easy pudding recipe with common ingredients in our pantry shelf. Here I prepared this Butterscotch sauce ahead of time to drizzle over this pudding. This Homemade Butterscotch sauce is very simple to make with just 3 ingredients that too without cream. I have used milk for whipping up this sauce instead of making with fresh cream. You can store this sauce in an airtight container and keep refrigerated for months. So let's move on to the recipe showing how to make Dates butterscotch pudding/ simple party pudding/ yummy pudding recipe/ dates pudding/ butterscotch pudding. 

simple pudding recipe easy dates butterscotch pudding desserts recipes sweet treat quick dessert dates recipes butterscotch sauce with milk ayeshas kitchen butterscotch recipes pudding recipes

simple pudding recipe easy dates butterscotch pudding desserts recipes sweet treat quick dessert dates recipes butterscotch sauce with milk ayeshas kitchen butterscotch recipes pudding recipes

simple pudding recipe easy dates butterscotch pudding desserts recipes sweet treat quick dessert dates recipes butterscotch sauce with milk ayeshas kitchen butterscotch recipes pudding recipes

You might also like

INGREDIENTS (1 cup = 250 ml)

Dates       - 8 nos, seedless, finely chopped
Biscuit   - 4 nos, crush gently with hand, can use any biscuit
Butter     - 1 tsp, unsalted
Nuts  - 2 tbsp, chopped, optional
Chinagrass - 4 gms, do not add more
Milk    - 2 cups
Sweetened condensed milk - half a cup
Sugar  - 3 tbsp, can skip this for less sweet
Butterscotch sauce - 3 tbsp, for decoration


PREPARATION

Please watch this below video showing how to make this pudding


  • Make the dates crumble first and set this aside. For that, heat a pan with 1 tsp of butter and make the flame to medium-low. Then add the finely chopped dates to it and saute for a while. Do not let them mushy. Then add the crumbled biscuits (crumble with hand only, few big crumbs are fine). Saute over a low flame until the biscuits are well coated with the dates. When done, transfer this dates crumble to a plate (you can add nuts now) and set this aside ready.
  • Now let's make the china grass mixture. For that, melt the chinagrass in half a cup of water until it melts to a clear liquid. When done, set this aside until we prepare the milk mixture but u must stir it occasionally or else it will set once cooled.
  • Now make the milk mixture. For that, heat a pan with a cup of milk. Once it starts to boil, add the sweetened condensed milk. Do not forget to stir the melted chinagrass. Mix the milk mixture well to combine. You can add sugar now (as this pudding is so sweet because of dates, biscuits and the butterscotch sauce you can skip adding sugar. But exceptional for sweet tooth guys). Mix and let it boil very well. Then add the melted chinagrass and stir very well for a minute. Then switch off the flame. 
  • Pour this milk mixture through a strainer into a bowl. Let it cool for 5 minutes (do not keep it for more), so that it will be easy for making layers. Now let us assemble the pudding.
  • Here i took two mini silicon molds. Or you can assemble this pudding in a pudding tray.
  • Pour some milk mixture into the silicon molds as the base for this pudding. Then layer the crumbled dates and nuts over it. Again pour the milk mixture to cover this crumble coat. Again layer some dates crumble. 
  • Let it keep refrigerated for 5 hours or over overnight to set.
  • Once done, invert this pudding to a plate gently (de-mold it). Garnish with the Butterscotch sauce and serve chilled.
  • Please watch the related video here - Click here.

Saturday, March 3, 2018

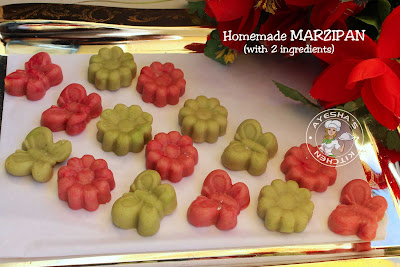
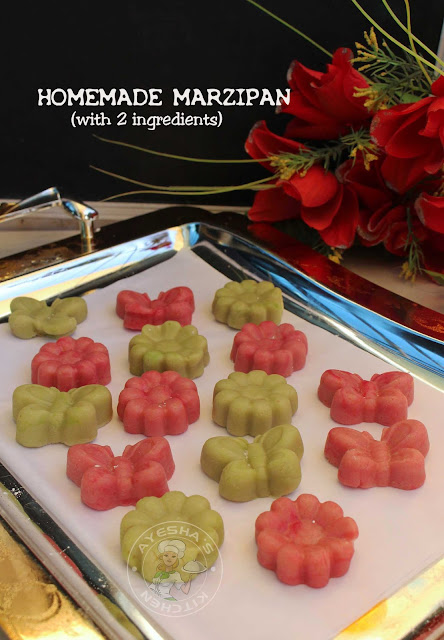
NO COOK 2 INGREDIENT MARZIPAN RECIPE - YUMMY SWEET

2 Ingredient Homemade Marzipan 

Homemade Marzipan is really worth trying than going to pre-made or store bought. Marzipan is used to frost cakes and all sort of goodies. As it tastes better than a fondant and helps to keep the cake moist, i prefer marzipan than a fondant for cakes. And it has a long shelf life of about 3 months when stored in the freezer. Here am going to make a sweet with this Homemade marzipan. This is a Christmas special sweet. Moreover, this marzipan is eggless, no-cook and vegan.  It is delicious and much easier to make. Just with two ingredients you can make this yummy treat for your kids and family. Powdered cashews can also be substituted with powdered Almonds. If so, you have to soak the almonds, peel and dry it completely and then powder it. You can shape this homemade marzipan into your favourite figures including fruits and vegetables. So let's move on to the recipe showing how to make Marzipan with two ingredients/ 2 ingredients marzipan/ Christmas sweets/ quick sweet recipes/ yummy sweets/ powdered cashew recipes.


marzipan 2 ingredient marzipan sweet recipes christmas sweets cashew powder sweets ayeshas kitchen recipes desserts recipes yummy treat

marzipan 2 ingredient marzipan sweet recipes christmas sweets cashew powder sweets ayeshas kitchen recipes desserts recipes yummy treat


marzipan 2 ingredient marzipan sweet recipes christmas sweets cashew powder sweets ayeshas kitchen recipes desserts recipes yummy treat

INGREDIENTS (1 cup = 250 ml)

Cashew nut     - 1 cup, fresh and unsalted
Icing sugar      - 1 cup
Sugar solution - 5 tsp (dissolve 2 tbsp of sugar in quarter a cup of warm water)

For color
Rose milk essence   - 2 drops
Pista essence     - 2 drops


PREPARATION

Please check below video showing how to make Homemade Marzipan 

  • Grind the cashews to a fine powder. But be careful, you must grind it in intervals else cashews will release its natural oil. Then sieve it well.
  • To this add the icing sugar (after sieving).
  • Now let's make a dough using sugar solution, add it little by little. I added 5 tsp of sugar solution only, so add accordingly. 
  • Knead it very well and form a soft dough.
  • Divide the dough into two portions. Make a hole in the centre and add food colour of your choice ( i added rose milk essence and pista essence). Again knead them separately. You can see the natural oil present in cashews is oozing out. Don't worry, it will dry up later.
  • When done, make small balls out of this dough and shape it using a silicon mould. (instead, you can roll this dough out and cut into desired shapes).
  • Keep them on the parchment paper once done and let it set aside to dry completely (preferably overnight or at least 8 hours). So the two ingredient Marzipan is ready to use. The shelf life of this sweet is 1 week when stored in an airtight container.
  • Please check the relative video here - 2 ingredient Marzipan.

Sunday, February 25, 2018

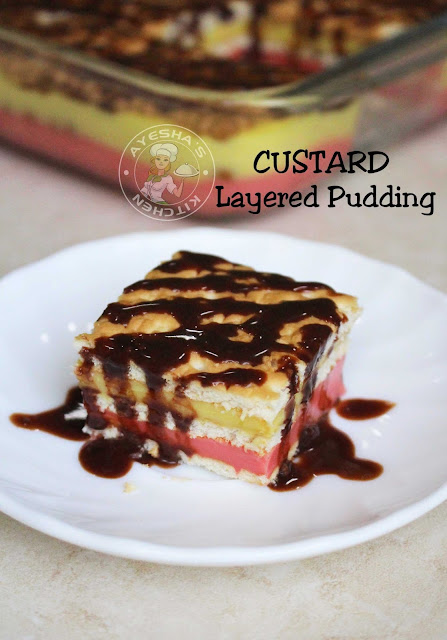
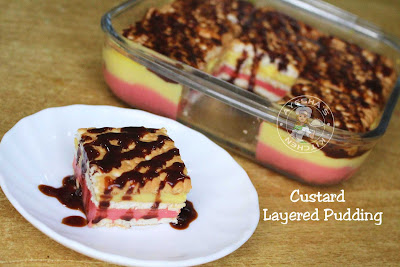
EASY VARIETY PUDDING RECIPE - MULTI LAYERED CUSTARD PUDDING

VARIETY PUDDING RECIPE / MULTILAYERED PUDDING RECIPE

We all love to have pudding after our main course meal. Pudding can be eaten hot or cold. But i love to have creamy cold pudding which is one of the easiest and satisfying dessert recipes. For those who are looking for a simple, quick and less ingredient pudding recipes, do have a look at this yummy treat. This dessert recipe is very easy to prepare and yes it melts in your mouth. Of course, this pudding calls for very simple ingredients which are commonly available in our pantry shelves. I highly recommend all my viewers to give variety pudding recipe a try and drop your valuable feedback and suggestion in the comment box below. So here is the recipe showing how to make multi-layered custard pudding recipe. 


Variety pudding multilayered pudding custard pudding ayeshas kitchen pudding dessert recipes easy pudding

Variety pudding multilayered pudding custard pudding ayeshas kitchen pudding dessert recipes easy pudding


Variety pudding multilayered pudding custard pudding ayeshas kitchen pudding dessert recipes easy pudding

INGREDIENTS ( 1 cup = 250 ml)

Biscuit   - 16 nos or as required (i used less sweet tea biscuit)
Custard powder  - 5 tsp, levelled
Milk   - 2 cups  + half a cup (for mixing the custard powder)
Sugar   - quarter a cup or little more as per your sweetness
Vanilla essence - 1 tsp
Rose milk essence - 3 drops (optional only)
Chinagrass - 4 gms

To garnish 

Nutella - 2 tbsp
Water - 1 tsp


PREPARATION

here is the video showing how to make this pudding


  • First, we can prepare the custard cream. 
  • For that take a bowl and add sugar, half a cup of milk and custard powder. Mix it well until combined without any lumps. 
  • Now boil milk (2 cups). When it starts boiling, add vanilla essence and mix well.
  • Now make the flame to medium-low.  Add the custard cream and immediately mix it until well combined. You can see the custard mixture starts to thicken. Let it cook for 4 to 6 minutes stirring continuously. Remove from flame when the custard mixture reach a thick flowing consistency. The consistency of custard cream must not be thicker.  Set this aside.
  • Then prepare the china grass mixture. Cook chinagrass along with half a cup of water until it melts to a clear liquid. When done, pour this prepared chinagrass to the custard mixture through a strainer and mix it very well. 
  • Transfer it to two bowls equally. To a bowl, add rose milk essence and mix it very well.
  • Now lets assemble this pudding.
  • Take the pudding tray. Layer some biscuits evenly as a base. Now pour the pink colored custard mixture over it. Again layer some biscuits and pour the yellow colored custard mixture over it. And finally, top the pudding with biscuits and let it keep refrigerated for 4 hours. 
  • When done, slice the pudding and drizzle some nutella cream (mix 2 tbsp of nutella with 1 tsp of water and make a smooth cream. ) over it for garnishing this dessert.
  • Yummy multi layered custard pudding is ready. It is a must try pudding recipe.
  • Click here to view the video showing how to make this video - multilayered pudding

Wednesday, February 21, 2018

KERALA FISH CURRY RECIPES - RED HOT KOTTAYAM STYLE FISH CURRY

SPICY FISH CURRY RECIPE - Kerala fish curry

Kottayam fish curry is a red-hot fish curry recipe which tastes absolutely perfect along with steamed rice. This Kerala fish curry is very popular around the globe. In Kottayam, this fish curry is also known as Meen vevichath. Gamboge or kudampuli is the main ingredient which adds sourness to this fish curry. And so, this curry recipe is No tomato fish curry recipe. I have shared many fish curry recipes on my blog like Goan fish curry, Kerala fish curry, Indian fish curry, Malabar fish curry, No oil fish curry etc. Do check my blog for a variety of fish curry recipes. So let us move on to the recipe showing how to make Kottayam style fish curry recipe / Kottayam meen curry. 

Kerala fish curry malabar kottayam spicy fish curry yummy tasty swad curry fish recipes ayeshas kitchen goan


INGREDIENTS

Fish                - 3 nos, make thin slices
Mustard seed  - half tsp
Fenugreek seed - 1 tsp
Garlic  - 3 cloves, chopped
Ginger - a small piece, chopped
Green chillies -  3nos, sliced
Shallots  - 10 nos, chopped
Kashmiri chilli powder- 2.5 tbsp (must use this chilli powder for the fine red texture)
Turmeric powder - 1 tsp
Gamboge / kudampuli  - 2 pieces, soaked in water
Water   - 1.5 cups
Coconut oil - 2 tbsp + quarter tsp (for seasoning)
Salt

PREPARATION

Please watch the below video showing how to make kottayam meen curry


  • Clean the fish well and cut into small pieces. Drain it well and then set this aside.
  • Soak the gamboge in water and set this aside.
  • Now heat a clay pot (more preferred) with coconut oil (2 tbsp). Once hot, add mustard seed and fenugreek seed. 
  • Allow it to splutter and then add chopped ginger, garlic and green chilies.
  • Saute for 2 minutes over a low flame and then add the chopped shallots.
  • Saute until shallots turn soft and then make the flame to very low (which is very important).
  • Now we have to add the spice powders. Add the turmeric powder along with Kashmiri chili paste (mix the Kashmiri chili powder with some water and add it little by little until it forms a paste). If you are using normal chili powder, then add less (than mentioned ) as it will be too fiery. 
  • Saute well over a very low flame until the oil separates or floats on the top (which is very important for getting the reddish color to this curry).
  • When done, add the gamboge along with the soaked water and salt. Mix well. Allow it boil. Then add the water (1.5 CUPS).
  • Again mix very well, cover it with a lid and allow it to boil.
  • When it starts to boil, add the fish pieces. Swirl the pot. And then cook for 5 to 8 minutes or until fish pieces are done.
  • When done, add quarter tsp of coconut oil on the top and remove from flame.
  • Let it sit covered for an hour and then serve.... for the best result. 
  • It pairs best with steamed rice or chapati.
  • Watch the video here - kerala fish curry

Wednesday, February 14, 2018

NO BAKE OREO CHEESE CAKE

NO BAKE DESSERT

Cheesecake, one of my family favourite sweet dessert. Cheesecake consist of one or more layers where the bottom layer or base will be often made from crushed cookies or sponge cake or graham crackers. Here am going to share the recipe for a no-bake cheesecake. Yes, it is very easy to whip up a no-bake cheesecake and thus impress your friends and family. Oreo cheesecake, Mango cheesecake, Nutella cheesecake like so you can make a variety of yummy and creamy desserts. Oreo cookies in cheese cream are perfect for a  party dessert idea. And I think this is the best way to make those cookies lovers happy. Moreover, oreo desserts are definitely a crowd pleaser. My Rose (my lil baby) will die for oreo desserts. So let us move on to the recipe showing how to make No bake oreo cheesecake.

no bake oreo dessert cheesecake oreo cheesecake chocolate dessert recipes

no bake oreo dessert cheesecake oreo cheesecake chocolate dessert recipes


INGREDIENTS

OREO LAYER

Oreo cookies  - 16 cookies
Unsalted butter - 50 g, softened

CREAM CHEESE LAYER

Cream cheese   - 200 g, softened, (i used Almarai cream cheese)
Powdered sugar - half a cup
Vanilla essence - 1 tbsp
Cool Whipped cream  - 2 cups (click here how to make it)
Chinagrass melted  - 10 gm (melt it to a clear liquid and cool it slightly)

TO DECORATE

Oreo powder    - quarter a cup

PREPARATION

Please check the below video showing how to make No bake oreo cheesecake 


  • Grease and line the sides of the springform with butter paper and set aside ready. I took two mini springforms. 
  • Butter and cream cheese must be at room temperature.
  •  To the grinder, add Oreo cookies and grind it to a fine powder. 
  • To this, add softened unsalted butter and mix well to combine.
  • Layer the prepared pan with this oreo mixture and level well with a spoon. Keep refrigerated for 10 minutes.
  • Meanwhile, prepare the cream cheese layer. For that, add the softened cream cheese in a bowl and beat until creamy.
  • When done, add the powdered sugar little by little. Beat until creamy.
  • To this add vanilla essence and again beat well.
  • Now add the cool whip (click here to see how to make it) to it (prepare the whipped cream and let it cool ) and fold well.
  • Then add the melted china grass (cook the chinagrass in water until it turns to a clear liquid. when done, pass it through a strainer and set aside in a bowl) which is slightly warm. Or you can use gelatin instead.
  • Whisk the chinagrass mixture until well combined. 
  • Now pour this prepared cream cheese layer over the oreo layer. 
  • Level the top and tap well.
  • Keep refrigerated for 6 hours or overnight to set.
  • When done, decorate it with oreo powder and serve chilled.
  •  Please watch this video no bake oreo cheesecake

Thursday, February 1, 2018

HEALTHY RECIPE WITH BITTER GOURD - BITTER GOURD PICKLE

BITTER GOURD RECIPE

Bitter gourd/ bitter melon/ kaipakka is an excellent source of various vitamins and is high in dietary fibre. Bitter gourd contains twice the calcium of spinach, twice the beta-carotene of broccoli and twice the potassium of a banana. Moreover, the insulin-like compound in Bitter melon is suggested as insulin replacement in diabetics patient.Some of the health benefits of bitter gourd are as follows - bitter gourd helps to kill cancer cells, it helps in treating blood disorders, it is beneficial to diabetic patients, it helps to improve eyesight, it helps in boosting the immune system, it is beneficial for respiratory disorders and much more. It is better to drink bitter melon juice than using bitter melon in any dishes. But as it tastes bitter, we refused to drink bitter melon juice. So here is my simple, yummy and healthy recipe with bitter gourd. Though the vitamins and enzymes will get destroyed in heat, you will still benefit a lot from its minerals and phytonutrients. This pickle with bitter gourd is very healthy when compared to other pickles. Here all the ingredients are cooked together in a clay pot until done and finally tempering the pickle with very less oil. Still, it tastes very delicious and is very less bitter too. So let us see how to make bitter gourd pickle / kaipakka achar.

Kaipakka achar kerala pickle recipe bitter gourd recipes bitter melon recipes condiments chammanthi kaipakka juice pavakka recipe pavakka achar

Kaipakka achar kerala pickle recipe bitter gourd recipes bitter melon recipes condiments chammanthi kaipakka juice pavakka recipe pavakka achar

Kaipakka achar kerala pickle recipe bitter gourd recipes bitter melon recipes condiments chammanthi kaipakka juice pavakka recipe pavakka achar

You might also like


INGREDIENTS

Bitter gourd / kaipakka / pavakka - 3 nos, sliced and chopped 
Onion - 1, big, chopped finely
Garlic - 1 pod, chopped
Green chilies  - 2 nos, slit
Tomato - 2, small, chopped
Tamarind/puli - a lemon sized, soaked in water and take its thick juice
Chili powder - 3 tsp
Turmeric powder - 1 tsp
Water - 1 cup
Salt

To temper

Fenugreek seed - half tsp 
Mustard seed - quarter tsp
Curry leaves
Oil

PREPARATION

Please click the below video for the detailed recipe video


  • In a clay pot (manchatti), add all the ingredients one by one. Mix well with a spoon. Add a cup of water and switch on the flame. Cover it and cook until the gravy thickens and the bitter gourd is done. (it will take around 15 to 20 minutes over a medium-low flame).
  • When done, remove from flame.
  • In a pan, heat 2 tsp of coconut oil. Add fenugreek seed and mustard seeds. Let it splutter over a medium flame. Add curry leaves and pour this over the prepared bitter gourd pickle. Close it with a lid and for best result let it stay aside for 2 hours. 
  • You can store this pickle in an airtight container and keep refrigerated for weeks.

Wednesday, January 31, 2018

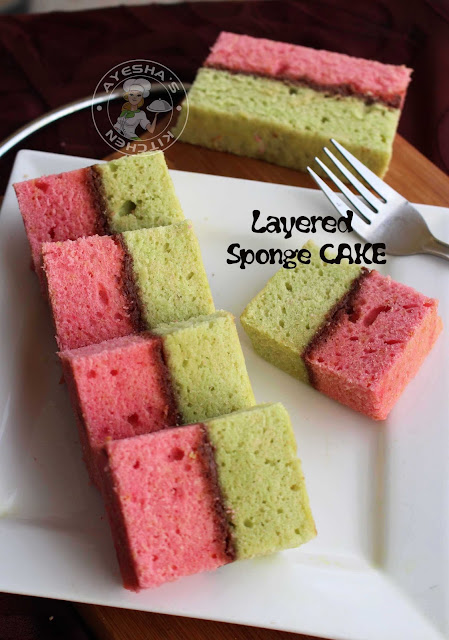
SPONGE CAKE - BAKING OF COLORFUL CAKE IN A SINGLE PAN

TWO COLORED SPONGE CAKES

Sponge cake wrapped in paper is always my kids favourite. They love to have it from Kerala Bakeries. It is better to avoid bakery sweets and snacks these days because of food adulteration. So i always prefer to make those stuffs at home for  the safety of our kids. I highly recommend all my readers to bake a cake at least once in our lifetime. Yes, you can bake cakes even without an oven or on the stovetop, or in a nonstick pan or in a cooker like so.   I had posted THE RECIPE FOR SPONGE CAKE without using an oven a few months back. So kindly please check the recipe of the same on my blog or please click HERE  for the sponge cake recipe without an oven. We all know that sponge cake is a cake based on egg, flour, sugar, butter and sometimes baking powder. But this two colored sponge cake calls for baking powder and I skipped the use of butter also. Kindly please check the detailed video showing how to bake a double coloured sponge cake in a single pan. 
sponge cake two colored sponge cake bakery cakes style cake layering tips and tricks strawberry cake rose milk cake

ayeshas kitchen cake baking tips basic tips sponge cake two colored sponge cake bakery cakes style cake layering tips and tricks strawberry cake rose milk cake

sponge cake two colored sponge cake bakery cakes style cake layering tips and tricks strawberry cake rose milk cake

INGREDIENTS (1 cup = 250 ml)

Eggs  - 3 nos, at room temperature
Sugar - 1 cup
Vanilla essence - 1 tbsp
Vegetable oil/sunflower oil - half a cup
All purpose flour/ maida - 1.5 cups
Baking powder  - 1 tsp
Salt   - a pinch, optional
Milk - 2 tbsp

For the coloring

Pista essence  - 3 drops
Rose milk essence - 3 drops
(you can also use any food colors instead)

To decorate 

Nutella  - 3 tsp or more


PREPARATION

Please check the below video showing how to make this two coloured cake 


  • First of all line the baking tray (rectangular shape) with butter paper. Then make a partition in the middle of the pan using a silver foil covered with butter paper (pls check the video for more details). Make sure that the partition is in the exact middle portion. Set aside. (you can grease the pan with butter before lining the pan so that it sticks well.)
  • Sieve together All-purpose flour, baking powder and salt. Mix well and set aside.
  • Now let's make the batter.  Whisk together eggs and sugar in a bowl using an electric beater until it turns light and airy which is very important. You have to whisk it well until it turns to white in colour. 
  • Then add vanilla essence and veg oil. Again whisk well. 
  • Now add the flour mixture little by little and fold well. (do not use the whisker ).
  • Finally, add milk and again fold. 
  • Now the batter is ready. Divide the batter into two bowls.
  • Add pista essence in one bowl and mix well. To the other bowl, add rose milk essence and mix well.
  • Pour the batter into the prepared pan without disturbing the partition in between. Tap the pan gently. And then bake it in the preheated oven at 150 degree C for 30 minutes. 
  • When done, remove from oven. Let it cool well. Take the cakes out of the pan. Separate the butter paper and then set aside the two colourful cakes.
  • Now gently cut the top of the cakes (u can use the leftovers for making cake lollipops or for any other dessert recipes).
  • Apply Nutella on one cake and keep the other cake upside down over it. Gently press it, so that it sticks well and looks like a single cake. Trim the sides if required. Let it covered with a foil for few minutes for the perfect slice.
  • Now slice and serve. Yummy and eye-catching cake is ready.
  • Click this link - how to bake bakery style two colored sponge cake

Sunday, January 28, 2018

HOW TO MAKE WHIPPED CREAM AT HOME WITH 2 INGREDIENTS

WHIPPED CREAM USING WHIPPING POWDER

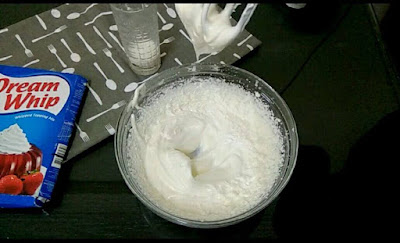
It is extremely easy to make fresh whipped cream at home to frost on cakes and pastries. You can make whipped cream in different ways. Whipped cream from milk or heavy whipping cream etc. But here I am showing how to make whipped cream using whipping powder and chilled milk. There are several brands of whipping powder available in the market. I prefer using Dream whip whipping powder. If you are using any other brands of whipping powder other than this brand, kindly please check the package instructions before whipping. As the whipped cream is a cream which is whipped by a whisker or mixer until light and fluffy, you need a hand whisker or wire whisker. Though it is very easy to make whipped cream using whipping powder, still you must be very careful while whipping. Whipping the mixture continuously for few minutes will leads to the formation of butter. So be careful that, you must not beat the cream at high speed continuously. That means you have to beat the mixture for 30 seconds over high speed and then stop for a second or two and again beat. Like so, continue the process until you reach the required consistency.  Scoop a spoonful of whipped cream, and invert the spoon. If the spoon holds the whipped cream without falling down, then it is whipped to the right consistency. And like so as per the package instructions of the Dream whip whipping powder, a sachet of whipping powder calls for half a cup of chilled milk where a cup is equal to 240 ml. But i have used only less than half a cup for a sachet of whipping cream. So use accordingly. And keep the milk out of the refrigerator for 10 minutes before adding it to the powder.  Freeze the glass bowl and whisker for 30 minutes before whipping which makes the cream to thicken fast. 

whipped cream whipping powder dream whip mactop cream icing cakes frosting stiff cream

INGREDIENTS (1 cup = 240 ml)

Dream whip whipping powder - 2 sachets
Chilled milk                              - a cup (few tablespoons less)

PREPARATION

Kindly please check the below video showing how to make perfect whipped cream at home using whipping powder.